An angle stop is a compact, L-shaped shutoff valve where a water line feeds a fixture. These valves are commonly located beneath sinks, behind toilets, and near appliance hookups. A functioning Plumbing Angle Stop lets you isolate one fixture without shutting off the main supply. That means repairs can be completed more easily.
Plumbing Angle Stops
Most home angle stops are 3–6 inches tall and turn water 90 degrees toward the fixture. Modern installations favor quarter-turn ball-style Angle Stop Valve designs. These are quicker to operate and tend to last longer. If an angle stop corrodes, leaks, or becomes stiff, replacing it helps prevent water damage and simplifies future maintenance.
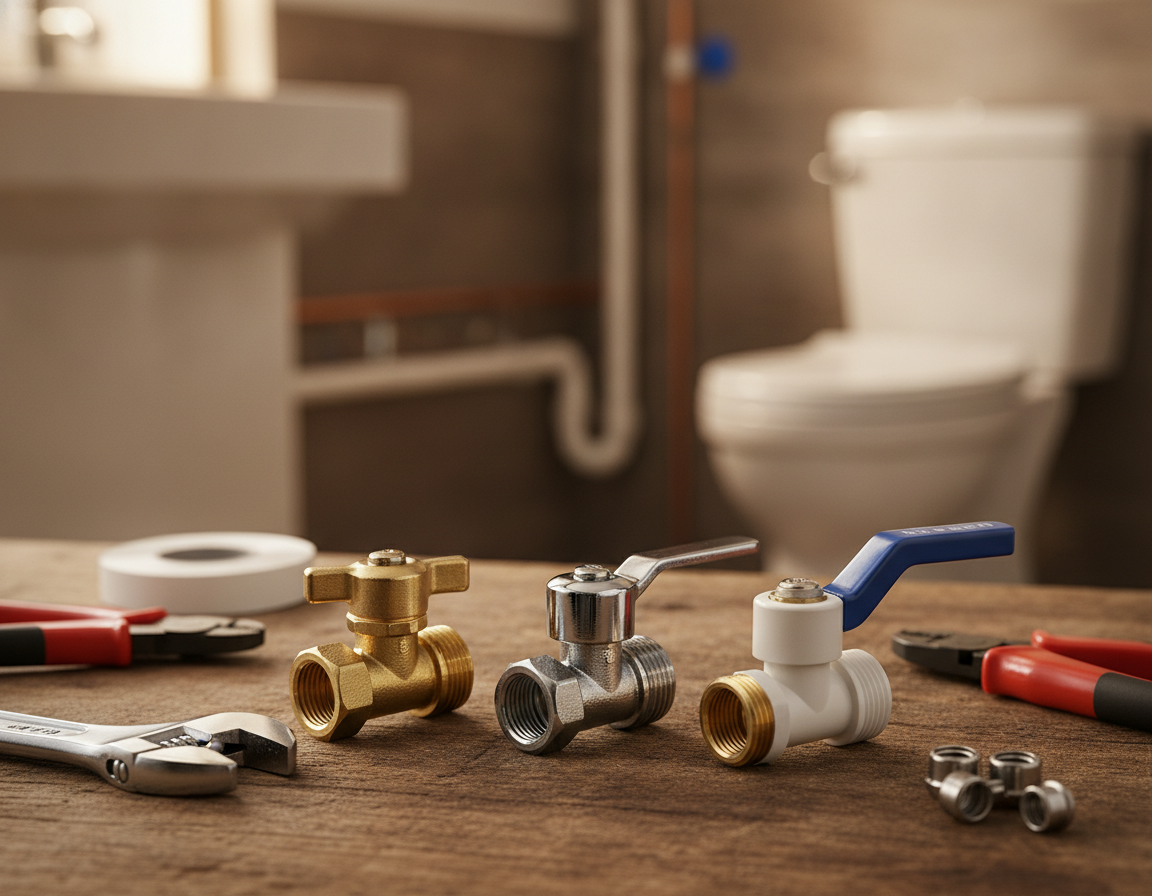
Key Takeaways
- Plumbing Angle Stops let you shut off water to one fixture without touching the house main.
- Angle Stops Plumbing are usually found beneath sinks, behind toilets, and near fixtures where quick access matters.
- Most Angle Stop Valve units are compact, often 3–6 inches tall, and redirect water at a right angle.
- Quarter-turn models are commonly preferred because they operate easily.
- Any valve that sticks should be replaced before it causes larger water problems.
Understanding An Angle Stop And Why It Matters
An angle stop is a fixture-level shutoff valve placed where the supply line connects to a fixture. It controls water to a single fixture so repairs, upgrades, or replacements can happen without closing the whole-house main. Homeowners, plumbers, and building inspectors rely on it to keep repairs quick and contained.
Angle Stop Definition Explained
An angle stop is a right-angle valve installed on the supply line feeding a fixture. Angle Stop Valves come in several styles, including older multi-turn stem designs and newer quarter-turn ball designs. The Plumbing Angle Stop fits neatly under sinks and behind toilets while saving space.
Where Home Angle Stops Are Usually Installed
Plumbing Angle Stops are most often installed below bathroom vanities and kitchen sinks. They are usually positioned near the rear of the cabinet where the water line comes through. Toilet stops mount on the wall behind the tank. You will also see angle stops at appliance connections such as dishwashers, ice makers, washing machines, and near some water heaters for cold-water shutoff.
Homeowner Benefits Of Angle Stops
A major advantage of an Angle Valve For Sink is fixture isolation. With a working Plumbing Angle Stop, you can shut off a single sink, toilet, or appliance line while fixing a leak or replacing a fixture. This keeps small leaks from turning into major water damage and limits disruption during repairs.
Another advantage is convenience. Angle Stops Plumbing are space-saving, quick to access, and reduce repair downtime. Turning the valve periodically helps keep it from sticking. Replacing old multi-turn stops with quarter-turn Angle Stop Valve models can make emergency shutoff less stressful.
Difference Between Angle Stop And Angle Seat Valve
Residential angle stops are made for fixture-level potable water service. They are designed for sinks, toilets, and common appliances. An industrial Angle Seat Valve is a different type of valve. It is built for higher-pressure, higher-temperature, or corrosive applications in steam, chemical, and HVAC systems. Angle seat valves use pistons and durable metal seats for tough service, while an Angle Stop is a simpler fixture-level shutoff for residential plumbing.
Angle Stop Types And How To Choose One
Selecting the correct angle stop involves comparing materials, operating style, connection type, and extra features. This guide compares common options to help homeowners and plumbers choose a durable, code-compliant fixture shutoff.
Materials
Brass is widely used as the standard material for Angle Stops. Because it resists corrosion and may last 10–20 years, brass is a strong choice for Quarter-Turn Angle Stops. Stainless steel bodies are useful in humid basements, coastal locations, and exposed areas where rust resistance matters. Plastic-bodied stops are cheaper, but they are typically less durable and can degrade in hot-water service. Always choose a Lead-Free Angle Stop for potable water in the United States to meet federal and state standards.
Operation Styles
Quarter-turn valves use a ball or disc and open with a 90-degree turn. They provide quick shutoff, low torque, and resistance to mineral buildup, making them a top choice for frequent use and emergencies. Multi-turn valves use a rising stem and require several rotations for full shutoff. They provide finer flow control but are more likely to leak or stick in older homes.
Connection Types
Compression Angle Stop fittings join with a nut and ferrule and suit copper or CPVC stub-outs. They are popular in remodels because they can be installed without soldering or open flame. Sweat Angle Stop connections are soldered to create a slim, permanent joint where torch work is safe and allowed. FIP-threaded valves screw onto male adapters and require PTFE tape or pipe sealant. Push-Fit Angle Stop products, including SharkBite-compatible models, slip onto copper, CPVC, or PEX for tool-free installs. Push-fit designs are handy for DIY jobs and cramped spaces, while Compression Angle Stop fittings are common where future removal or rework may be needed.
Useful Special Features
Some Angle Stop Valve models include a Water Hammer Arrestor Angle Stop. These use a piston or air chamber to absorb shock from quick-closing fixtures and reduce noisy banging. For coastal or humid environments, choose a Coastal Angle Stop with corrosion-resistant finishes, stainless internals, and anti-seize stems. A Lead-Free Angle Stop marking on the body helps confirm the valve is intended for potable-water use. Choose a valve that matches the pipe material, connection type, and service conditions to reduce premature failure.
Plumbing Angle Stops
Plumbing angle stops control water flow to fixtures with a right-angle design. Choosing the right size and style affects performance, ease of service, and compliance. Below, we cover common markings, placement, potable-water standards, and modern standardization trends.
Common Valve Sizes And How To Read Markings
In most homes, the inlet side is commonly 1/2 inch nominal, while the outlet to the fixture is often 3/8 inch compression. Valve markings often appear as 1/2 x 3/8, 1/2” MIP x 3/8” OD, or similar size combinations. This identifies the inlet and outlet sizes. Some valves are marked 3/8 COMP to indicate a compression outlet. Make sure the inlet matches your supply pipe, whether it is 1/2 FIP, 1/2 MIP, or 1/2 sweat.
Typical Placement In The Home
Angle stops are usually installed under kitchen sinks, beneath bathroom vanities, and behind toilets. Dedicated stops may also serve dishwashers, ice makers, washing machines, water heaters, and other appliances. Under-sink stops usually sit at the back of cabinets, while toilet stops remain visible behind the tank.
Potable Water Code And Safety Notes
In the United States, valves used on drinking-water lines must comply with lead-free requirements for wetted surfaces. Look for a Lead-Free Angle Stop with compliant markings and documentation. Contractors should follow local plumbing codes and provide the appropriate certifications, testing information, and warranty support.
Industry Trends And Recommended Standard
Modern Angle Stops often use quarter-turn ball designs. The Quarter-Turn Angle Stop gives quick emergency shutoff and long life with brass construction. Experts often recommend a brass 1/2 x 3/8 angle stop for sinks and toilets for easier stocking and maintenance. Models with arrestors and other potable-water protection features are increasingly common in new installations.
Selection Checklist For Angle Stops
- Check Valve Markings before buying so the inlet type and outlet size match your system.
- Make sure the Angle Valve For Sink or toilet stop matches the supply hose, fixture threads, and tank connection.
- Specify a Lead-Free Angle Stop when the line serves potable water.
- For many homes, standardizing on Quarter-Turn Angle Stop 1/2 x 3/8 valves can simplify maintenance and improve reliability.
Installing And Replacing Angle Stops With Tools Steps And Best Practices
When tackling a plumbing angle stop, it is important to know when to shut the main water supply. Only shut the main if the existing stop will not close fully, is damaged, or is frozen. For most replacements, you can isolate the line using the valve under the sink. Always relieve pressure by opening a downstream faucet, and keep towels plus a bucket nearby.
Before the repair begins, collect the necessary tools, fittings, and supplies. Common tools include an adjustable wrench, a backup wrench, a tube cutter, and a deburring tool. Emery cloth for copper, PTFE tape for threaded joints, a marker, and a flashlight are also useful. For push-fit work, use the manufacturer’s push-fit angle stop and a PEX stiffener where needed; for compression jobs, keep spare ferrules and nuts available. Penetrating oil and a heat shield help with stubborn fittings and sweat connections.
Checklist:
- Adjustable wrench plus backup wrench
- Tube cutter and deburring tool
- PTFE tape plus marking pen
- Push-fit valve and required stiffener
- Extra ferrules, nuts, oil, towels, and cleanup supplies
Follow specific steps for each connection type. For compression, slide the nut and ferrule onto the pipe, then seat the valve against the pipe shoulder. Start the nut by hand, then tighten another 1/4–1/2 turn with a wrench. When tightening the outlet nut, use a backup wrench to prevent twisting the stub-out.
For push-fit installation, cut the pipe square and deburr it. Mark the insertion depth, then push the valve straight onto the pipe until it reaches the mark. After installation, give the fitting a light tug to confirm it has locked in place. Push-fit angle stop fittings work on copper, CPVC, and PEX; use a stiffener for PEX where required.
Sweat angle stop connections need careful preparation and heat control. Remove or protect seals, clean and flux the pipe and valve cup, heat evenly, and apply solder properly. After cooling, wipe the joint to remove residue. A heat shield or removal of heat-sensitive parts helps prevent damage during soldering.
For threaded connections such as a FIP angle stop, wrap male threads with PTFE tape using three to four wraps and start the valve by hand to avoid cross-threading. Tighten until aligned and sealed, then connect the supply line and test slowly.
Test the work by turning water on slowly and watching the joints. Open the angle stop and fixture gradually. Wipe joints to spot tiny weepers. Operate the valve, let pressure stabilize, and inspect again for slow leaks.
Be aware of common mistakes that can lead to failures. Over-tightened compression nuts may deform ferrules and create leaks. Never reuse a damaged ferrule; cut back the pipe and install a new ferrule when needed. Avoid sweating valves without protecting seals or removing internal parts. Avoid twisting push-fit valves during insertion and always follow the manufacturer’s insertion-depth marks.
Typical problems include frozen or leaking stops that require main shutoff, incorrectly applied PTFE tape on threaded joints, and outlet nuts tightened without a backup wrench. Keeping spare parts available and following proper tightening guidance helps reduce repeat repairs.
Common Problems And Quick Repairs For Angle Stops
Homeowners often encounter small leaks and frozen handles with angle stops. A quick inspection can show whether the valve needs a minor repair or complete replacement for dependable service.
Leaks Around The Handle
In older multi-turn valves, seepage at the stem usually starts with a loose packing nut. Tightening the nut about 1/8 turn with an adjustable wrench can often solve the issue. If water still seeps, the internal washer, O-ring, or packing may be worn and the valve may need replacement.
Stuck Valves
Mineral Buildup, corrosion, and rust commonly cause stuck angle stops. Applying a penetrating product such as WD-40 for about ten minutes may help. Gently rocking the handle back and forth may free the valve. If it remains stuck or the handle is brittle, replace the stop to avoid a flood.
Leaks At Compression Joints
A continuing compression-joint leak often points to a crooked ferrule, damaged pipe end, or poor seating. To fix it, loosen the nut, reseat the ferrule, and clean the pipe with emery cloth. If the ferrule is worn, cut back the pipe, install a new ferrule, and tighten carefully to prevent more leaks.
When Replacement Makes Sense
If a home has repeated leaks, frozen handles, visible corrosion, or valves older than about ten years, modern angle stops are worth considering. A Quarter-Turn Upgrade to a ball-style valve can improve shutoff speed, resist Mineral Buildup, and make emergency service more dependable.
Quick Checklist
- Tighten the packing nut slightly for stem drips.
- For stuck valves, apply Penetrating Oil and use gentle back-and-forth motion.
- Reseat the ferrule or cut back the pipe for compression leaks.
- When valves repeatedly freeze, leak, or stick, upgrade to quarter-turn stops.
Turning angle stops occasionally and inspecting for corrosion can reveal problems before they become emergencies. Fixing leaks, stuck valves, and weeping joints promptly helps prevent bigger repairs and supports Angle Stop Reliability.
Final Thoughts
This Plumbing Angle Stops Guide shows why small fixture shutoff valves are so important. They let homeowners shut off one fixture without disrupting water to the whole house. Selecting the proper material, valve operation, and connection style makes future repair work simpler. It can also lower the chance of water damage during fixture upgrades and maintenance.
For best performance, the industry often recommends lead-free, quarter-turn brass 1/2 x 3/8 stops. Integrated arrestors are also useful where water hammer is a concern. Homeowners should periodically test valves and replace Plumbing Angle Stops that leak, stick, or corrode. Parts may cost $6 to $60, while professional installation can range from $75 to $200 depending on location and complexity.
When installation feels uncertain, hiring a licensed plumber is the safer option. A plumber can ensure code compliance and provide warranty-backed work. That approach helps protect fixtures, reduce risk, and make future maintenance easier. It also supports current Angle Stops Plumbing best practices for today’s residential systems.